Beginner Sublimation Printer Setup: Full Guide & Tips
Best Sublimation Printer Setup for Beginners
If you’re stepping into the world of sublimation printing, the first big question is always the same: What exactly do I need to set up my workspace properly? When I first got into sublimation, I made the mistake most beginners make — buying tools I didn’t actually need and skipping the ones that would have made my life much easier. So today, I’m breaking down a simple, budget-friendly, stress-free sublimation printer setup that I wish someone had given me when I started. Whether you’re planning to customize shirts, mugs, tumblers, or home décor, this guide will help you build a solid foundation.
⭐ 1. Choose the Right sublimation printer setup
Your printer is the heart of your setup. If you’re a beginner, you want something reliable, easy to maintain, and capable of producing vibrant, accurate colors.
Top Beginner-Friendly Printer Types:
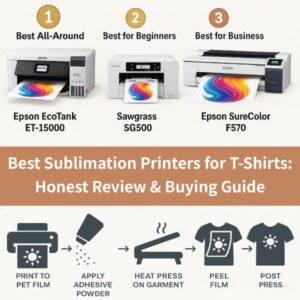
✔ Ready-Made Sublimation Printers (Best for Ease)
These printers come designed for sublimation right out of the box.
-
Examples: Epson SureColor F170, Sawgrass SG500
-
Why choose this: No conversion needed, consistent print quality, fewer issues.
✔ Converted EcoTank Printers (Best for Budget)
EcoTank printers can be converted to sublimation using third-party sublimation ink.
-
Best picks: Epson ET-2803, ET-2720, ET-15000
-
Why choose this: Affordable, easy ink refills, great for learning on a budget.
Tip: If you’re a total beginner, a ready-made sublimation printer removes the learning curve—but a converted EcoTank is perfect if you want to save money.
⭐ 2. Use High-Quality Sublimation Ink
Great prints depend on great ink. Cheap ink leads to dull colors, clogged heads, and frustration.
What to look for:
-
Vibrant color profile
-
Quick drying
-
No clogging
-
ICC profile availability
Brands like Hiipoo, Printers Jack, and Cosmos Ink are popular among beginners for their consistent results.
⭐ 3. Pick the Right Sublimation Paper
Believe it or not, paper makes a noticeable difference. Good sublimation paper holds ink without bleeding and releases it cleanly during pressing.
Recommended qualities:
-
Fast drying
-
High ink absorption
-
Smooth transfer
Most beginners do well with A-SUB or HTVRONT sublimation paper.
⭐ 4. Heat Press: The Tool That Makes Everything Come Alive
A heat press ensures your prints embed permanently and vibrantly into your blanks.
Types of beginner presses:
✔ Flat Heat Press (Best Overall)
Perfect for shirts, tote bags, pillowcases, and more.
✔ Mug & Tumbler Press
Designed specifically for cylindrical items.
✔ Multi-Function Press (Budget All-In-One)
Great for beginners wanting versatility, though not always the most durable.
Ideal temperature range: 380°F–400°F
Typical pressing time: 45–60 seconds (varies by material)
⭐ 5. Must-Have Accessories for a Smooth Start
These small tools save you from big headaches later on:
-
Heat-resistant tape – Keeps transfers in place
-
Butcher/parchment paper – Prevents ink blowout
-
Lint roller – Essential for shirts
-
Heat gloves – Safety first!
-
Heat mat or workspace protection
Optional but incredibly helpful:
-
Teflon sheet
-
Squeegee or scraper
-
Color swatch chart
⭐ 6. Choose Sublimation-Compatible Blanks
To avoid disappointment, make sure your blanks are made specifically for sublimation.
Good beginner-friendly items:
-
100% polyester shirts
-
Sublimation-coated mugs
-
Tumblers
-
Coasters
-
Keychains
-
Mousepads
Shirts should be at least 65% polyester if you want vibrant color. The higher the polyester content, the better the result.
⭐ 7. Beginner Setup Layout (Easy Workflow)
A simple layout can make your workspace feel more professional and efficient:
-
Printing station: Printer + paper storage
-
Ink & accessory shelf: Tape, gloves, lint roller
-
Heat press station: Heat-resistant surface
-
Cooling area: Rack or tray for finished products
Even in a small room, organizing these zones makes the process smoother.
⭐ 8. Common Beginner Mistakes to Avoid
Learn from others so you don’t repeat their mistakes:
❌ Touching the printed design before it dries
❌ Pressing too long or too hot
❌ Using cotton shirts (colors will look faded)
❌ Forgetting to mirror your design
❌ Not using the right pressure on the heat press
With proper setup and a little practice, these issues disappear quickly.
🎉 Final Thoughts
Starting your sublimation journey doesn’t have to be overwhelming. With the right printer, reliable ink, quality paper, and a few beginner-friendly tools, you’ll be creating professional-looking designs in no time.
Whether you’re building a small home business or exploring a creative hobby, this basic setup sets you up for long-term success. And trust me — once you get your first perfect transfer, you’ll be hooked!